How to Install Desktop Goose
How to install and setup desktop goose!

Date: 2020-02-25 17:29:51
By:
In order to follow this guide you will need to download Desktop Goose. Please click the green button below.
Desktop Goose is the new craze as tons of people are finding surprising joy watching a rascally goose ruin their desktop. What many people may not know is that there's actually a ton you can do with this tiny little program! Here's a guide on installing and then modifying it however you please.
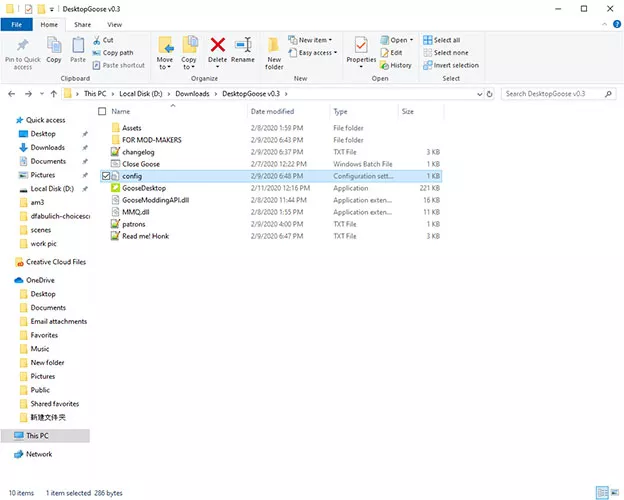
Installing the program is easy. Simply run the executable and select where you want to unzip it.
After that, you just need to simply go to the file that you unzipped to and run the executable. Then the awful, awful goose will pop up on your desktop and start ruining your day.
But wait! There's actually a lot of things going on under the hood that you may not be aware of. If you head on over to the config folder, you'll see a ton of different settings that you can change.

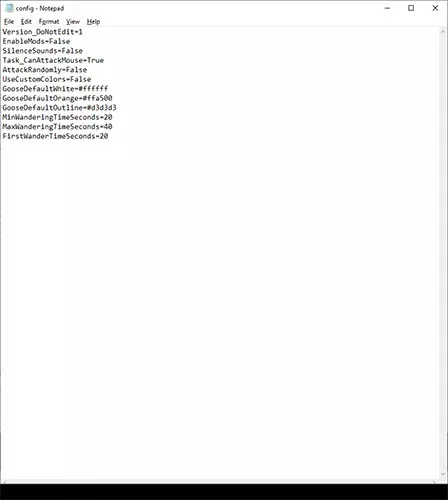
You can open this config file with any text editor you want. I personally simply opened it with the normal notepad.
Once you open it, you'll see that there are a ton of different settings. These settings let you modify the aggression of the goose, the color of it, and various other settings.

Let's go over each of these settings!
Version_DoNotEdit=1
As it implies, you really don't want to touch this setting. It'll break the goose.
EnableMods=False
If you're using mods, then you should replace "False" with "True" here (no quotation marks). Check out our other guide for more information on that!
SilenceSounds=False
Getting annoyed at its constant honking? Then this is the wrong program for you, but you can also mute him by toggling it to true here.
Task_CanAttackMouse=True
If you don't want the goose to go after you mouse and drag it all over the screen, then you should probably toggle this to False.
AttackRandomly=False
The default settings have the goose attacking in certain intervals. If you want it to be uncontrollable chaos, then toggle this on.
UseCustomColors=False
This relates to the next couple of settings. If you want the goose to use colors that you define, then toggle this on.
GooseDefaultWhite=#ffffff
GooseDefaultOrange=#ffa500
GooseDefaultOutline=#d3d3d3
These three settings let you change the color of the goose assuming you've toggled that to true. DefaultWhite refers to the goose's body, DefaultOrange refers to the goose's beak, and DefaultOutline refers to the goose's...well, outline. If you want to change it to a certain color, you'll need that color's hex code. Go to this link to find the perfect color you're looking for.
MinWanderingTimeSeconds=20
MaxWanderingTimeSeconds=40
FirstWanderTimeSecond=20
This refers to how long the goose will wander around for. Min and Max Wandering Time will let you modify the timeframe in which it wanders. For whatever reason, its first wandering session has a unique value, and you can change that there as well.
You might think that the config file is the end of it when ti comes to customizing the goose. Not quite. Have you noticed that the goose likes to drag images and text files onto the screen? Well as it turns out, you can modify those as well.

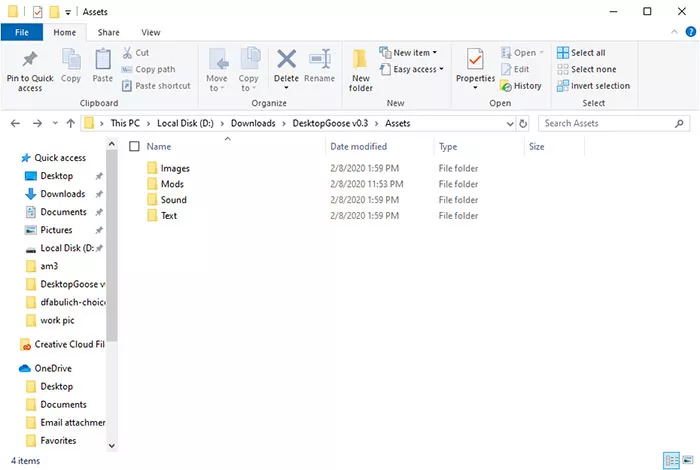
If you open the Assets folder, you'll find more folders. If you want the goose to drag on specific images, then drag those images into the Images folder. You can drag almost any image file in, including GIFs - and the GIF will play out when it's dragged on screen! If you want to have it drag certain text files on, then drag them into the Text folder and...well, you get the point.
I hope that helps you enjoy (or force your friends to enjoy) Desktop Goose even more than you were!
How to Use Desktop Goose
Confused on how to install mods? Take a look at this guide!
Desktop Goose may only be under a month old, but it's already had a very very active modding scene. Mods have already come, gotten broken with a new update, and been updated to compensate. It resembles an incredibly ...


